Halloween Upcycle Project – Neon Skulls In A Jar

Check out this fun project I’ve been working on…

I had these old plastic skull Halloween decorations that looked a little less than spooktastic so decided that instead of showing them to the trash I’d give them a little TLC.

List Of Items I Used…

Clean Un lidded Glass Jar (Medium Size)
7 Small Plastic Skulls
Pink Fluorescent Neon Pink Paint
Black Sharpies Permanent Marker Pen
Selection Of Flat Backed Crystals And Gems
Illuminator Paint (Glow In The Dark Paint)
Black Netting (Type You Get Marbles In)
Plastic Black Spider Ring
Jet Black Paper Ribbon
Mosaic Adhesive

First I painted all my boring skulls a Fluorescent neon pink (total of two coats, leaving to dry fully in between).

Then I used my sharpie permanent marker pen to highlight and add bone structure and additional features.

20131013-000000.jpg

Once complete I used a good strong Mosaic adhesive to add some bling into the eye sockets of all skull. As you can see some got blue gems others got green, some even got heart gems making them more a sugar skull than a scary skull.

I left eyes to fully set for at least an hour before giving all skulls to coats of Illuminator paint (this dries clear so if you try this yourself then don’t panic!)
Be sure to let dry a few hours in between coats or you will cause the first layer to go funny.

20131013-000602.jpg

Once fully dried I carefully arranged them into my jar and covered it with the black netting. I secured the netting by twisting it and adding a little spider ring. To finish I added my black curly ribbon.

20131014-180249.jpg

Display in or out their jar

20131014-180404.jpg

20131014-180444.jpg

20131014-180516.jpg

These are UV reactive and will glow in the dark (charge with a UV torch).

The skulls are available in my etsy chic collective store. I made one for myself and one for the store. Go grab it or have a try at making your own.

Kids Crafts – A Crown To Get You Noticed

Ok, so Alice’s school will be awarded a very large check of money today! Why? Because her school have taken first place in this years spelling bee table… In our language, it simply means that her school boasts some of the best spellers in the country.

To help to share the schools success the local paper will run a piece accompanied by some images of some of the pupils. In order to get selected as one of the chosen pupils to be photographed, children including my daughter, were asked to make a crown, the type that would get them noticed. Well, my daughter being the girl who never shies away from a camera, got on the job right away.

Armed with a box of bits and bobs, she got to work. Given we had to be somewhere yesterday evening meant she didn’t actually have all that long to design and create her “large” noticeable hat! But in all fairness this little lady is pretty capable of doing some fantastically creative projects in a tiny space of time.

So… Here it is! Her flower, butterfly, and of course… Bumble bee crown.

20130618-125750.jpg

She used all sorts of materials to create her crown, from tissue paper to sequins, glitter to foam, card and decorative tape. A mountain of flowers that were so delicately sprinkled with glitter, then laid lightly around the crown. She even made a bumble bee eye mask to match her large hat! Alice may now have walked the walk to school with a head full of bumble bees but she did so in style.

20130618-125823.jpg

She is a real inspiration my amazing Alice-Sara! Even if her oversized bumble bee crown doesn’t get her in the local rag, it gets her in my top spot list, as she always does, time and time again!

Well, thanks for checking out the crown of bumble bees! We hope Alice-Sara has inspired your little ones to get creative with buzzing bumble bees.

Great Kids Crafts For Fathers Day

Homemade cards are more personal than that of the shop brought kind! That’s why my little ones have been busy making Father’s Day cards ready for daddy’s special day.

For the younger ones a template is a great idea and Baker Ross have provided us with these fantastic template cards that just require kids to draw in the missing parts and then fill them with colour.

20130613-222339.jpg

Kids love drawing faces (well my toddler does) its one of the first things most learn to draw. On these cards your child can draw in any type of facial expression they desire! They can even match the features (hair, eye colour etc) to that of their own daddy. Whether it be grumpy or smiley, the end results are just brilliant. You can even turn the card over to design the back of dads head… How cool is that!

Harley age 3 had so much fun working on these that we went through the entire pack in just one day. Ok, Alice also had a go and if truth be told… So did I!

20130613-222302.jpg

Here’s the results….

20130613-222418.jpg

Whats more you can even add other art materials to give your cards a certain edge. Kids can use goggly eyes or how about adding glitter to dads tie, or string for his hair? The possibilities are endless!

Card templates are available from Baker Ross Ltd (8 pack £1.99)

Kids Crafts – Painting A BirdHouse

We love a delivery from Baker Ross! Our last delivery was one packed with fantastic products all of which the children really enjoyed getting creative with.

Crafting, is a great way to amuse the kids during the school half term. We have so far had no boredom set in, despite the rainy weather we have experienced here in london these past few days! Why? Because the children have been busy painting and decorating their very own birdhouse.

The suppliers (all provided from Baker Ross Ltd) were as follows…
Box of cardboard readymade Bird Houses, selection of 8 Grotto acrylic paints (designed specifically for children), PVA glue and some fantastic and EZ Stones (that I’ll explain a little more about later within this post).

The toddler age 3 and my daughter Alice Sara 10, Had a fabulous time painting their birdhouses.These cute little houses come ready-made and all that is required is your child’s colourful imagination and some child friendly grotto paint. Grotto acrylic paints are specifically designed to be used by children, they come in 8 colour shades, are supplied in their own carry case, and are all water based and 100% safe to use.

20130601-040635.jpg

Alice Sara used the paints to decorate her birdhouse in a Multi coloured stripy fashion. She then used sponge stamps to decorate various areas of her birdhouse. Harley also went for a Multi coloured design and enjoyed mixing and swirling his paints all over his house… And mine!

20130601-040725.jpg

The children gave their birdhouses an hours drying time before applying PVA glue to the roof and then covering the glue in crystal EZ stones. These colourful vibrant crushed natural stones add a Three-dimensional effect, giving it that something. a great alternative to glitter. textured, sparkling effects. 6 assorted colours, 150g per colour.

20130601-040824.jpg

This is the very first time myself and the children have come across EZ stones but already we love them! They really help to make a craft project that little bit different. The natural stones have been finely crushed making them easy to work with. They are available in an array of fantastic colours and can be added to almost any surface whether its a painting on standard paper or a huge playhouse made of cardboard boxes and toilet roll tubes. I’ll be honest! These stones can leave a little mess around the table/floor but that’s easily sorted with a clean dust pan and brush (you can then sweep them back into their original containers and seal).

Now, back to the project at hand! Once the glue was completely dried and the stones firmly stuck in place, the kids painted a few layers of Mod Podge as to give it a seal and protect the kids lovely art work.

So… Here are the finished birdhouses!

20130601-041030.jpg

I love these cute colourful birdhouses and think the kids did a fantastic job. I know that if I were a bird I’d definitely fancy popping in for a quick bite to eat! Wouldn’t you?

If you think your little ones would love to get creative in this way, then just pop over to the Baker Ross ltd online store where all of the listed materials can be easily found. The great news is that Baker Ross Ltd don’t charge the earth for these materials and whats more they can even be brought in bulk which saves you even more money (fantastic for schools and community groups ect).

Well, thanks for reading! We (myself and the children) hope this project has inspired you to get crafty.

Kids Crafts – Painting Pebbles

20130419-071607.jpg

We, meaning myself and the kids, collected lots of pebbles while on our recent trip to the seaside. Once we got them home we decided we would paint them for the garden.

Our pebbles would be used to brighten up flowerpots and flower beds. Here’s what we used…

Various Pebbles (collected from the beach)
Acrylic paints (various colours)
Mod Podge
Googly Eyes
Glitter glue

You can paint your pebbles anyhow you like the possibilities are endless. This is a great little craft project that you can do with the kids. My very own toddler loved it.

The activity held my creative little three year olds attention for over an hour. He painted in various colours before adding different coloured googly eyes and painting on red smiles.

20130419-071718.jpg

His little stones were painted and glittered… Messy but fun.

Once the toddlers pebbles were dry I added a layer of Mod Podge to give them a shine as well as a protective layer.

Yourself, along with the kids, can let the imagination run wild painting & creating allsorts of designs and patterns from funny faces to dinosaurs, dots to hearts.

We also made some pebble bugs using paint and googly eyes. For our bees and lady birds we used some foam pieces to form the wings. For our spider we used some garden wire for the legs. These are currently busy drying on the window pane, but I’ll be sure to post another little update once they are dry and ready to display.

As for Harley’s wacky face pebbles, we plan to place them around the flower beds in our garden today (given it remains bright and sunny that is).

20130419-071842.jpg

Hope we have inspired you to have fun with paints.

Remember… Painting on paper is fun but painting on pebbles is awesome!

20130419-071820.jpg

Kids crafts – Easy Easter Felt Art

20130323-030741.jpg

This is really easy and great fun for pre-schoolers.

The idea is for you to create the felt shapes and then for your toddler to use them to create and decorate an Easter egg.

What’s great about this craft idea is that your child will require nothing other than that of the felt to create his egg. There is no sticking, cutting or mess to be made by your child! Once they have designed their egg, they can simply remove the felt pieces and do it all again! The kit can then be stored away and played with again at a later date.

All you will need to create this kit for your pre-schooler is that of the following….

An egg template (or make one with card)
A pencil
Various coloured felt
Scissors and craft knife
A3 coloured card
A4 card any colour
A4 foam sheet
A5 self Adhesive foam sheet
Glue dots
Mounting tape

Here’s what to do (Note – This is so easy you could do it in as little as ten minutes.)

Firstly use an egg template like mine below and with a pencil transfer the shape onto some felt. Do this by drawing around the shape. Once you have finished, cut out the felt egg shape with a craft knife and leave to one side for later.

20130323-025935.jpg

Next use different pieces of contrasting coloured felt to cut out various shapes in various sizes. You could cut out felt strips, hearts, triangles, squares, circles, zig zags and much more besides.

20130323-030122.jpg

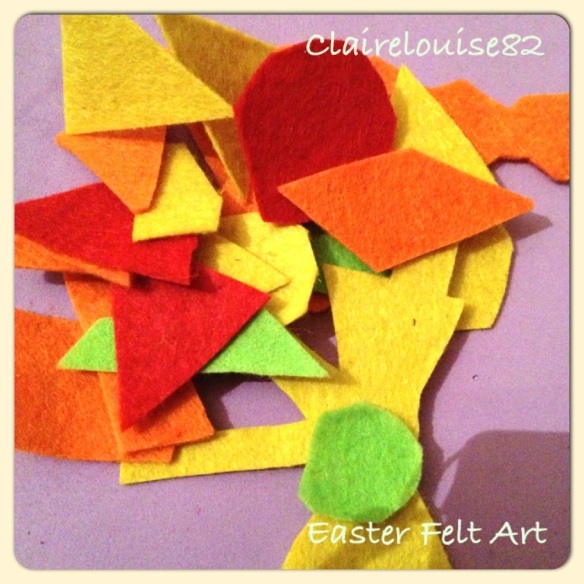
Once you have cut out all your shapes your felt art is almost ready to play with.

First though, take the A4 card line it with glue dots making sure all the corners are also covered and lay your foam of the same size on top.

Now your card and foam are attached, again with glue dots attach the green felt sandwiching the foam in the middle.

Now cut the sandwiched piece of board in half and trim down excess if needed (my felt slightly overlapped the card base).

20130323-030209.jpg

Once you have two halves , put one half to one side and cut the other in half again. Place the two halves to one side.

Now Bring back your bigger halve and stick it to your thick self adhesive foam making sure you stick it down on the card side (not felt).

Trim down any excess if needed. By placing my egg in the centre of the felt, it allowed me to see how much I wanted to cut off. My felt base finally resembled the base of a standard birthday card.

20130323-030305.jpg

I then brought forward my large coloured card, folded it in half like a birthday card and stuck my felt board onto one side of the centres fold with double sided mounting tape .

I now had the two smaller halves I cut earlier on left. I got rid of one ( this isn’t needed) and stuck the other halve long ways up on the opposite side of my cards centre fold with mounting tape.

Lastly, bring forward your felt egg that you prepared as one of your first steps and use mounting tape to stick it to the centre of the large green felt board.

The card should now be able to close like a book with the felt being on the inner side.

20130323-030414.jpg

How to use…

The felt board on one half of the card would be the place for your toddler to get creative and decorate his/her egg. The felt stripe alongside it (opposite halve) would line the pieces of felt that are not currently in use.

20130323-030510.jpg

20130323-030524.jpg

Now that you’ve completed the felt kit, simply give it to your child and watch as they get creative, letting their imaginations run wild.

The best bit for me is the lack of mess involved! Felt sticks to felt really well without being hard for little ones to remove it! Its heaven not having to mop up after him, he can easily pack this away himself once his finished playing with it. Harley honestly thinks that felt is magical, especially considering his so used to using gloppy glue.

When your felt game isn’t in use, close it like a book, keeping the felt and all its pieces inside and store in a plastic zip bag, tin or ice cream container ready to play with again on another day.

20130323-030638.jpg

Here’s some ideas for your kits…

Make additional cards for different occasions like Christmas and Chinese New Year.

Use the cards to help your child’s recognition of the various seasons, events and celebrations.

Use the felt game to help your child grasp the various different shapes and colours contained within the kit.

Create new cards together as your child grows and develops new interests.

Add new shapes when existing shapes begin to age, or just add new shapes every now and then to keep the game fun and exciting.

This is a lovely craft idea that is in a sense very educational too. Felt play will benefit your child’s development both physically (fine motor skills) and academically (shape, colour recognition, creative art).

So why not have a go? I’m sure your little ones will be mighty impressed!

Kids Crafts – Bug Boxes and Masquerade Masks

I love crafting with the kids! As mentioned Little man who is 12 and has Aspergers Syndrome and he isn’t overly keen on the whole crafting thing.But younger sister Alice-Sara and the Toddler can’t seem to get enough of it!

We are very lucky to be Baker Ross Ltd Reviewers and love the fun stuff they send us. Last week we shared some really fun activities, including… Scratch art bug magnets, British butterfly decorations and decorated foam pencil cases (click here for post)! This week its all about glitzy Carnival Masquerade mask kits (perfect for the upcoming festival season) & cute foam bug boxes.

The children really enjoyed decorating the masks. We were sent a set comprising of 2 kits. Each contained, pre-cut foam mask, feathers, sequins, glitzy self adhesive decorations and a wooden stick for supporting your mask in place as you hold it to your eyes.

20130304-051239.jpg

The only thing we needed was some glue to stick the feathers and sequins, plus some tape for holding the stick in place.

20130304-051548.jpg

20130304-051647.jpg

Given Alice-Sara is 10, she required no help whatsoever. I helped the toddler correctly place the glitzy foam around the eyes but basically let him go wild and freestyle the rest.

20130304-051347.jpg

20130304-051445.jpg

Foam is a difficult material when it comes to sticking things to it with glue and many ordinary glues just don’t cut it. We’ve been using Baker Ross Ltd Tacky Glue for a while now and this seems to work perfectly. Also it should be noted that the same applies when it comes to taping down your stick in place, so good strong tape works best!

These were so much fun to make. Follow the examples on each instruction sheet inserted in each kit or let the creativity within come flooding out by letting the little ones freestyle their own design. I love the way these turned out.

20130304-051726.jpg

The Bug Box Kits are very cute and simple to make. We were given a set comprising of 4 kits, each containing, a small box, large foam shape, smaller self adhesive foam pieces and instruction sheet. You will again require some glue or double sided tape to stick your finished bug to the lid of your box. Once again we used the tacky glue and found this worked just fine.

20130304-051850.jpg

Alice constructed a bumble bee box and with my help the toddler worked on the lady bird box (the two bug designs in this kit).

20130304-051946.jpg

Harley just needed some assistance to remove the backing paper from the self adhesive shapes and guidance on where to place them. He decided he wanted to play with his finished ladybird for a while before finally securing him to the lid of the box, which was fine with me. 🙂

20130304-052048.jpg

20130304-052127.jpg

Alice found these very simple and made hers really quickly. She said that they were a little two easy, meaning the whole crafting experience was over relatively quickly. Nonetheless, she did love the end result all the same.

I think all the craft, activity sets from Baker Ross ltd would make great additions to a party bag or even used as party activities instead of games. Kits are also perfect for rainy day play, creative activities for nurseries or even pre-schools. They are fun and creative and help kids master fine motor tasks while realising inner creative flare.

Reference section

Bug Box Kit (4 pack) £3.96
Carnival Masquerade mask kits (2 pack) £2.50
Baker Ross Ltd Website

Alice wins £750 with her post card from Santa

Christmas Eve, we awoke to some wonderful news. Opening my inbox I couldn’t believe it. Alice had won first prize in the Travel Supermarkets Post Card From Santa Christmas competition. The prize… A very lovely cash sum of £750. Christmas had certainly came a day early in our house.

20130102-202843.jpg

I’ve always been proud of my daughters creativity. She has this wonderful imagination when it comes to thinking up ideas and is superb at making her ideas come to life.

I blogged Alice’s entry just before Christmas. The post showcased her prize winning art and we also shared a video of Alice creating her master piece.

If being crowned the winner wasn’t enough, Alice was also sent a card featuring her entry by the guys at travel supermarket. Her grandmother is currently proudly doing the rounds with her card, showing everyone just how talented her granddaughter is. When its returned I will be adding it to our scrapbook of family memories.

So, how did Alice react when she discovered she had won? Well, once she had finally closed her mouth and blinked removing the stunned expression from her face, she danced around the room like a crazy person before phoning and telling everybody & anybody who would listen.

Alice plans to buy herself a tablet (she’s currently deciding on which model) she also wants to buy some more art supplies (though I’ve tried convincing her she already has more than enough already). Lastly she hopes to grab a few monster high dolls in the sales to add to her growing collection and the rest she’s saving as spending money for an upcoming holiday.

20130102-203136.jpg

So we would just like to say a big thank you to Travel Supermarket for running such a fabulous competition. Its certainly made my little girls New Year.